
Epoxy Floor Installation: What to Expect
The outcome of an epoxy floor installation is shaped by everything that happens before the first coat is poured. A professional process works through each phase in sequence because each one creates the conditions the next step requires.

The Short Answer
Five distinct phases make up a professional epoxy floor installation: an assessment of the concrete's current condition, surface preparation, crack and defect repair, placement of the coating system, and a properly managed curing period. The flooring contractor who handles the work starts by looking at your specific slab and explains the expected schedule before work begins.
What Happens During Professional Epoxy Floor Installation?
Every reliable installation follows a defined sequence. Each phase matters because what happens at one step sets the conditions for every step that follows.
01
Evaluate the Concrete
The contractor begins with a thorough look at the slab — recording its condition, testing for moisture, identifying existing coatings or surface damage, and noting anything that could affect which system is suitable. That information shapes the plan for everything that follows.
02
Prepare the Surface
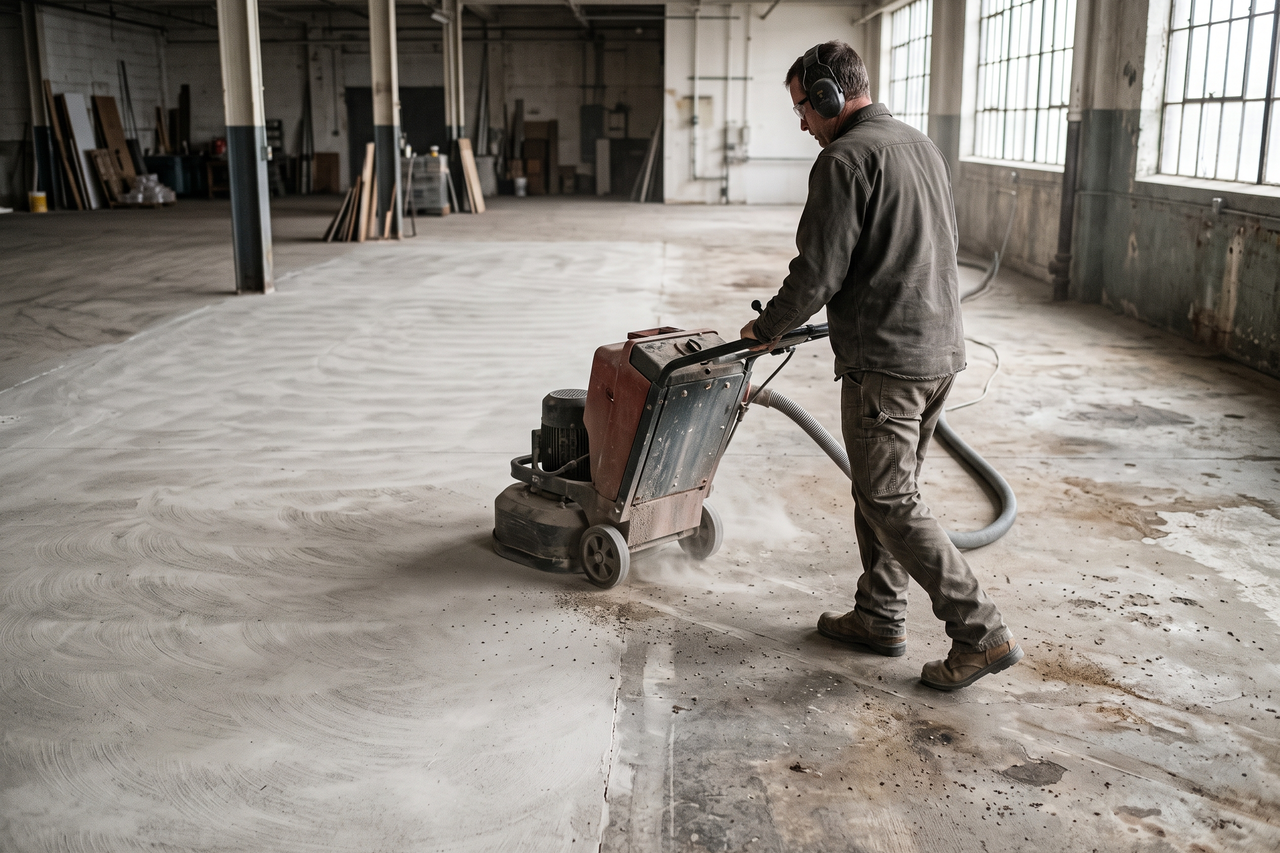
Grinding or shot blasting opens the concrete’s pore structure and creates a mechanical profile for the coating to grip. Without that profile, the coating has no reliable bond point. The method and depth of the work depend on what the floor looks like before grinding begins.
03
Repair Cracks and Defects
Surface cracks, spalled patches, and deteriorated sections are filled and stabilized before any coating is placed. Applying a coating directly over damaged areas creates points of weakness that can show through the finish surface or allow moisture to migrate beneath it.
04
Apply the Coating System
The installer places each component of the coating system — primer, base coat, decorative broadcast if specified, and topcoat — in the manufacturer’s prescribed sequence. Each layer cures before the next is placed.
05
Allow the Floor to Cure
The coating hardens progressively. Foot traffic is permitted first; vehicle loads and full chemical resistance arrive at later stages once the coating has cross-linked to the depth the system requires. The installer explains the expected schedule before work begins.
What Makes a Professional Installation Different?
When a floor is installed professionally, every choice along the way reflects the actual state of that particular slab — its moisture content, its prior coating history, its surface condition — rather than a template approach carried over from a previous project. The contractor inspects the floor, determines what it needs, and confirms those conditions are satisfied before advancing to the next phase.
The value of that discipline shows up long after the job is done. A coating that loses adhesion or develops delamination early in its service life often traces back to something in the preparation or application phase that wasn’t matched to the actual slab conditions. Professional assessment addresses those factors before they become problems.
We’ll work to connect you with an independent flooring contractor who can review the project and, if it’s a fit, prepare a customized quote.
Why Concrete Preparation Matters
For a thorough look at how the prep stage works — grinding methods, crack repair approaches, and moisture testing — see our guide to concrete preparation for epoxy flooring.
Concrete preparation is what makes adhesion possible. The grinding step cuts an open profile into the concrete, creating the texture and porosity the coating needs to form a bond at depth rather than resting on a sealed or smooth surface.
The extent of grinding required varies based on the floor’s history. A floor that has never been coated and has a naturally open profile needs different treatment than a floor covered with a tightly adhered previous coating or one that has been sealed over time. Preparation is adjusted to what’s actually present, not applied uniformly regardless of conditions.
Repairing Cracks and Surface Damage
Before any coating material is placed, the contractor addresses visible cracks, spalls, and surface voids. That step creates a more consistent surface across the floor and removes the points through which moisture could eventually migrate beneath a finished coating.
The repair method depends on the crack type and cause. Fine surface cracks in stable concrete may be handled by the primer coat under certain conditions. Wider or active cracks — those showing signs of ongoing movement — typically call for a flexible repair material or, in more involved cases, a structural approach. The contractor reviews each defect and explains the plan before proceeding.
Coating over damage that hasn’t been adequately addressed can produce results that become visible later — coating edges that lift around a crack perimeter, or cracks that continue to read through a topcoat as they deepen.
Applying the Epoxy Coating System
For a look at how epoxy and polyaspartic coatings compare in durability, UV performance, and application behavior, our epoxy vs. polyaspartic guide covers the key distinctions.
With preparation finished, the coating system is placed layer by layer. Most installations begin with a primer that penetrates the prepared surface and seals it before the base coat is applied. If the project calls for a decorative flake broadcast, that material goes into the wet base coat before it firms up.
The topcoat layer is what the floor’s surface becomes — the part that handles daily contact, abrasion, and whatever chemical exposure the space involves. How many layers the system includes, which products are used, and the total film thickness are all specified to match the actual demands of the space. A commercial floor exposed to forklifts or chemical cleaning cycles is configured differently than a two-car residential garage, and the contractor’s recommendation reflects those specific conditions. Throughout application, the installer monitors ambient temperature and humidity, since both affect how each coat sets.
How Long Does Epoxy Flooring Take to Cure?
Our epoxy floor coating cost guide walks through the factors that affect project pricing, including size, concrete condition, and coating system selection.
Curing is sequential. The floor’s surface firms to the point where foot traffic is safe first, before it’s strong enough to handle vehicle contact or rolling loads. Each threshold arrives at a different point in the curing process, and attempting to use the floor before it’s ready can mark or damage the coating.
Full chemical resistance — where the coating can handle solvents, cleaning agents, and sustained loads without risk of surface damage — is the last milestone. It requires the coating to fully cross-link at depth, which takes longer than the surface-ready stage.
The schedule for reaching each milestone varies with the coating product, the total number of coats applied, and the temperature and humidity present during and after installation. The installer explains the expected schedule before work begins, so you can plan around each stage of use.
Frequently Asked Questions
Does the contractor need to evaluate the floor before recommending a coating system?
Yes. The assessment informs every decision in the project — system selection, preparation method, repair approach, and application conditions. Recommending a coating without first looking at the concrete means making those decisions without the information they require. The contractor reviews moisture levels, existing coatings, and surface condition before any recommendation is made.
What happens if surface preparation is incomplete?
Adhesion relies on the mechanical profile that grinding creates. A coating placed on an insufficiently profiled surface has a weaker bond to the substrate, and that weakness tends to manifest as delamination over time. Inadequate preparation is among the factors — alongside moisture and coating selection — that contribute to early coating failures.
Can a new coating go over an existing one?
It depends on what’s currently on the floor and how well it’s adhered. A product that’s still fully bonded to a properly prepared slab may be compatible as a substrate for a new system, subject to evaluation. Anything that has separated from the concrete, lifted in sections, or is deteriorating at the bond line typically needs to come off before a new coating goes down. The contractor assesses the existing surface and explains what it requires before recommending a path forward.
How will I know when each stage of use is safe?
The contractor covers this before work starts. Foot traffic, vehicle use, and full chemical exposure each have different milestones in the curing timeline, and the installer explains where those fall for the specific system and conditions involved.
What if cracks appear in the concrete after the coating is installed?
Post-installation cracks are a concrete behavior issue — caused by movement, moisture variation, or settlement — rather than a sign of coating failure. The installer can review any new crack that appears and advise on whether it warrants attention and what options are available.
Do temperature and humidity affect the installation outcome?
Yes. Each epoxy and polyaspartic product has specified environmental conditions for application and curing. Operating outside those parameters can affect adhesion or cure chemistry. The contractor monitors conditions and plans the project around them.
Ready to Upgrade Your Concrete Floor?
We’ll work to connect you with an independent flooring contractor serving Mendota, IL and surrounding areas who can review the project and, if it’s a fit, prepare a customized quote.